


This post may contain affiliate links which means I may receive a commission for purchases made through links. Learn more on my Private Policy page.
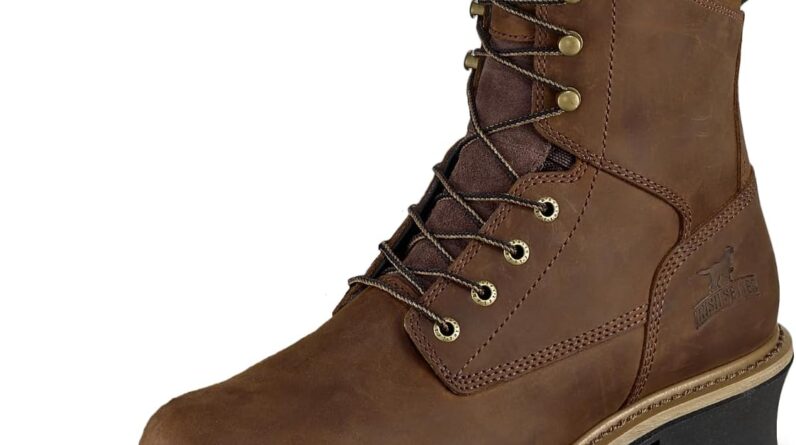
welcome to boots bye my name is William and today I'm gonna talk about six expert ways to lace your boots let's get into it okay so the first lacing style I'm going to do is called the criss cross standard and basically this is the most common lacing method whenever you buy a pair of boots it shows up looking like this in most cases some are different but this is the most standard and so that's what we're gonna start with so what you do is you start with your lace and you go from the outside if you have an odd number of eyelets like I do you go from the outside of the boot inside so when you get that you want to kind of lift both of these up and make sure that your laces are an even length otherwise it's going to be weird at the end and from there you just choose the side and you go from the outside of the boot like that and then the other side I'm also going to go from the outside of the boot all right now that you got that kind of tighten it up a little bit and then you just repeat the same process but always starting on the same side of the eyelets so in this case I started on the inside of the boot and so even though so I'm just gonna keep going in that direction keeping that pattern otherwise you're gonna get some like mixed up it's gonna look all mixed up and it won't look good so you don't keep with the same half of the lace you just keep on the same side of the boot just like that and you continue over the top until you are finished [Music] boom so there you have it guys that is the crisscross standard this is the most common one it's also very simple very easy and once you just start it it kind of just finishes itself so that's number one the criss cross standard alright this is step number two and this is called the army method the reason why it's called the army method is that most of times military boots they're not really known for their comfort so army men though they get their the try on the boots they'll get a bunch of blisters and eventually they learn this lacing style because it allows for extra flexibility in the leather and will prevent a lot of blisters it adds a little extra room so they don't have to worry so much about hurting their feet so again you're gonna come in from the top of the boot right here so you're gonna go from outside to inside on that bottom eyelet so you get that first rung so the first step you're gonna do is go ahead and do a simple cross so I'm just gonna kind of do the same one that I did last time I'm gonna go from this time though bringing the lace diagonally over and through the inside to the outside so same thing over here diagonally over through the inside to the outside and I'm not tighten that up a little bit make sure it's even then starting on this one this is where I'm gonna start is always on the inside you don't have to but once you pick a side just stick with it then I'm going in to the next vertical highlight so I don't cross over I just go in right up here and then I repeat that action over here on this side boom now again picking the same side I'm gonna cross over after I've done this next vertical eyelet look cross over through the inside boom same thing on the opposite side boom tighten that up then again vertical eyelet up press it in cross it in and then just repeat those steps alright so that is method number two that is called the Army method alright method number three is called the over/under friction-free so this one is very similar to the criss cross standard but instead of but we're gonna do a little variation that's gonna change things up and this is a really cool one that kind of adds a little bit of it's a little different than the criss cross standard it's a little more unique so that's why I like it we're gonna give it a shot basically again starting going outside in on the bottom eyelet if you have an odd number of eyelets you're gonna start going from outside to in and then the next move is to go under this is the opposite if you have an even number of eyelets but in this case I have seven eyelets I think yeah one two three four five six seven so I'm gonna start from the outside going in and then the next move I'm gonna make is I'm going to go from the inside to the outside diagonally so go ahead and do that on both sides again always starting with the same side and then the next one over I'm going diagonally across and over but I'm going outside in more repeat on this side outside in very good and then I'm going inside out inside out then again one more time outside and outside and and continue that until you're done there you go be over under cross friction free boot style okay lacing style number four is called a paratroopers ladder this one's a little different because we're gonna start off going inside to outside on the bottom rungs I'm just going to lace this through and then I'm gonna make sure we have an even amount got it very good so the first step here is done really much matter which side to do but I'm just gonna keep going this way you lace it through the you know from outside into the next vertical eyelet for both sides cool so now that you got that I'm gonna go ahead I'm gonna bring this over horizontally and I'm gonna go under this little eyelet that I created so I'm gonna I'm not actually going through the eyelet across I'm going through the lace so I'm gonna do that for both sides sweet so as you see when I brought it diagonally across I did not go through an eyelet I went through that little loop that I created right here and here awesome I'm gonna go ahead and now go through the next vertical eyelet like that and do the same on this side great and then again as I bring it over I'm going to go under the new eyelet that I created and under the new eyelet I created boom alright so now I'm just going to continue that process the reason why this one this is a good lace that you might want is this adds a lot of security so it really puts your heel into the into the heel of the boot really reduces a lot of friction keeps your foot very secure you know paratroopers if they're going out they're gonna be you know landing they're gonna be at a full sprint as soon as they land so they're gonna need something that's very very secure and this is the best option for them and this is number four this is the paratroopers ladder check it out all right boot lacing style number five this one is called the rope ladder let's check it out so again just like the paratrooper ladder what you're gonna do is you're gonna start going from inside to outside and then make sure these are evenly spaced hopefully you can see this but what you're gonna do is cross this over twice to make a loop like that so I basically just again took these two laces and cross them over until they kind of tangled with themselves pulled it down and then I'm going to take this and go in I'm gonna go in through the bottom to the outside so that's the key on this one you're always gonna be going through the bottom of the eyelet to the outside and then you're gonna start that process over again bring it up kind of make sure it's even they're gonna cross it over once until it's kind of tangles up on itself and then you're going to cross it through and under and out so that is how you complete that one and now I'm just gonna finish it out one thing on this one to note is that you want to kind of space these make sure these are in the middle after you make the knots otherwise and kind of have them off to either side like you know that and it just looks funky it doesn't look as uniform I think maybe that's something you want but I personally like the style I think it looks really good with like lager boots or work boots it's really secure again it keeps the heel pushed back into the heel of the boot so if you struggle with blisters or anything like that you're breaking in a pair of boots this is a good lacing style for keeping it very secure so I'm just gonna go through and finish this lacing really quick so you can see what it looks like when it's all finished there it is number five the rope ladder in action this is a good one for very secure ankle support and these laces they're gonna they're gonna last actually a really long time because they're not they don't have much friction on the boot itself so there it is the rope ladder lasts at number six we have what I'm calling the Italian corkscrew so by the way all these names I've have made up or I've gotten from somewhere else most of them I made up myself but so these aren't actually names don't go talk to your friends about like have you tried the Italian corkscrew you might think you're weird anyway for this one you're gonna start basically going from the outside in like so this one's a little weird definitely different than any other lacing style we have on this but if you have really tight boots that are hard to get on this is this way is really easy to unlace so for like for this pair of boots for instance I need to get out like four or five eyelets so that I can kind of open this up so it's wide enough for me to fit my foot in so you if you have any boots that are really hard to put on I love this lacing method because it makes it really easy to undo and then redo and you don't have to kind of fuss with two strings you only have to mess one so the secret to this one is you're gonna make one side really really short make one side that is about long enough only to go you know this is going to rest about here so that's pretty short but as you can see or maybe you can't see this is how much there's a huge difference between how much I'm gonna leave so you start off in the bottom rung and then you go all the way from the bottom through the top eyelid that is just gonna be there and you're only gonna work with this side of the string and you're just gonna corkscrew it all the way up so now I'm taking the long end of the string I'm going from the outside in and I'm gonna go the next available the horizontal eyelet and then from here straight straight across going outside to in and I'm gonna repeat that same motion over and over and over again I'm gonna tighten this up a little bit so again I'm just gonna repeat that same exact motion going horizontally across and the underside and then going on the outside in repeating that same movement over and over again like it's a corkscrew alright and then on this last lease you're gonna notice that you had your on the inside and you don't really have an eyelet over here to go into so you just go in and out like that bang there you have it what I'm calling the Italian corkscrew if you haven't already please tap the subscribe button down below thank you so much for joining us at boots bye if you want more fit and style recommendations you can head over to boots buy.com right now and check that out again thank you so much for joining us and until next time put your best foot forward