

This post may contain affiliate links which means I may receive a commission for purchases made through links. Learn more on my Private Policy page.
I'll try not to break any fingers. I bought a pair of
the indestructible shoes to see if they are actually indestructible or if
they're just a cheap gimmick. So I've got a video coming up in a couple weeks of
how to resole a pair of common projects or any other white sneaker brands that
use a margom sole but I don't have a pair of worn-out common projects. So if
you've got a pair and you want me to resole them hit me up on histogram and
I'll resole them for you for free so I can actually have a resole for that video.
And it's probably gonna be a loud video today. We're running a little behind on
production so we're working late on production, and there is yard work going on
outside and there is also a drives through right outside so I can't wait to get into the
new shop. Now let's get to the shoes.
So these are the indestructible shoes or at
least one version of them. I got these off Amazon. And there's tons of different
places you can buy them under tons of different names. These ones in particular
are the brand Edsy E D S Y. The model is 703. The color is green. They retail for
$45, and it doesn't really say where they're made anywhere. But I think it's a
pretty fair assumption to guess that they're made in China. And like I said
there's tons of different brands but I think they're probably all made in the
same factory so this this review should be pretty Universal for all the
different places you can buy the shoes.
And if you don't know what these shoes
are we must be in two completely different demographics because I see
these like the ads for these non-stop on all the different social media platforms.
They're the shoes that, and I'll just put like some of the screen shots with them
stomping on nails and running them over, and doing all sorts of crazy stuff to
them. And there's already quite a few reviews out there of people recreating the
test that you see in those advertisements. So I don't want to do
those just over again and but I still want to do them. So we ran it over with the
car.
The steel toe worked fine. We stood on a group of nails, worked fine though it
was quite scary. They are twist-able and bendable and they
do weigh less than a pound. And so instead of going really in-depth
into those I want to try some different tests that maybe will give us a little
bit more quantifiable data, though not the most scientific, it's still better
than nothing. So there's two main things I want to get from this video.
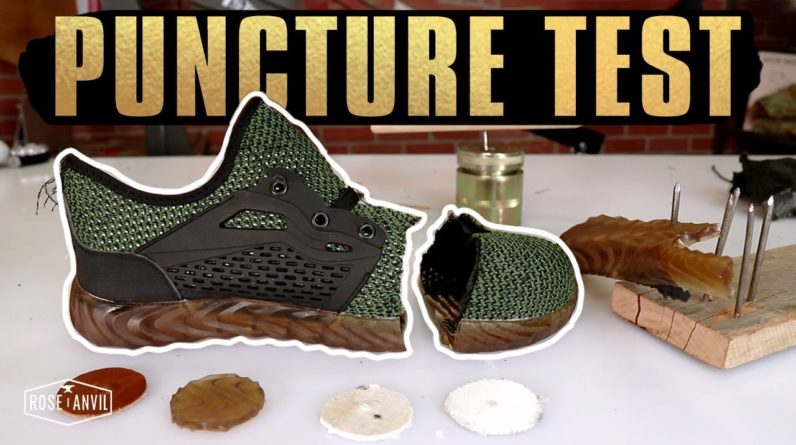
The first
one is I want to see how these are built and how strongly they're built or how
well though they're built. So we're going to turn the layers apart and kind of see
what's inside and see how hard as a tear apart. And the second thing we're gonna
do is attempt to put some numbers behind how puncture resistant the outsole is
and this Kevlar midsole is. So let's start with kind of dissecting this shoe
first before we do the tests. Okay. I got it all torn apart so let's go
through the layers starting with the insert or insole.
So just a EVA foam
insert, pretty cheap, nothing much to it. Then we go down to the Kevlar layer which the
first half of it came out really easy. It was actually already loose so I pulled
out most of it and then I had to cut the vamp to get to the rest this out
because right where the the Steel Toe rolls underneath it was really well
glued together. Next layer down I guess would be the Steel Toe. So I cut this off
separately rather than cutting on the band saw for a couple of reasons. The
first reason is I didn't want to try cutting through Kevlar with my band saw.
That just sounded like a disaster waiting to happen. The second thing is I
didn't want to try to cut through this Steel Toe without being able to test it
just to see that it's a Steel Toe. So this will give us a nice platform to be able to
test the Steel Toe on hopefully.
And then next layer down we've got the outsole. So this
thing is surprisingly thin. For as many people who are stomping around on nails in
the advertisements and other reviews (including myself) this is a lot
thinner than I expected it to be. It's around 4 millimeters thick and it just
feels like typical, I don't know my guess is PVC. It doesn't really say it doesn't
say on the advertisements or in the listing anywhere.
But it feels really similar to the PVC soles in the Doc Martens. So that's my
best guess. And I don't think this is very puncture resistant. I thought this
is going to be at least two or three times the thickness to give it some
puncture resistance so I think all of that puncture proofness comes in the
Kevlar. But I guess we'll see. And then next is the upper.
I'm guessing a
polyester knit fabric. The one thing I was really concerned about when I was
cutting this open is I was hoping it was really hard to tear the upper from the
sole, which it was. Because a lot of times in a cheaper pair of shoes the upper, you
can just basically peel it off and it's a good sign that the shoes are only gonna
last a short amount of time, but with these it was really hard to
tear apart.
I had to get the channel locks out to pull it apart. Another
potentially bad thing was this Kevlar midsole is really small. My concern would
be if I was relying on this shoe for actual puncture resistance that a nail
would hit the side of the shoe, miss this Kevlar midsole, and end up hitting my
foot. So that's that's kind of a big concern of mine. We'll see if this
outsole is actually puncture resistant at all but if not, that's kind of scary.
And then I also want to take a durometer measurement on this outsole
and if I puncture it in there it comes to about 14-12 range which is even softer
than the margom outsoles which is probably it's not going to be great for
puncture resistance.

So now let's move the puncture resistance tests that are
going to be super scientific. And there is equipment out there that tests this but
it's super expensive and I'm trying to get to a point where I can afford that
equipment because it'd be really cool to get some numbers on different aspects of
shoes and boots and puncture resistance and strengths and materials, but until
that point we're just going to kind of wing it. So for this test I think I have
an OK solution. So this is this is a coin ring kit where I should be able to cut a
circular patch of whatever material I'm trying to
puncture test: the kevlar midsole and the outsole. So what this will allow us to do
is put this inside of this and put the cap on top which will press down on that
swatch equally (hopefully) everywhere but the hole so that when we put this dye in
here and put pressure on it that's that swatch isn't gonna slip in. It shouldn't
hold it pretty tight and give us a good measurement of how much force it takes
to actually puncture through.
Okay after playing around with it for a little bit
I think I've got a test that's gonna work enough. Got a nail in a 2×4 but it's
set deeper inside the 2×4. This 2×4 is hopefully going to give us an equal-
a more level and more distributed platform to hopefully push on this nail with
equal force without bending it one way or the other.
Okay. Then we've got a couple guides here that're going to help prevent too much
slop back and forth and hopefully give us as straight of a press as possible.
Okay. Now let me show you the testing setup. Okay this is the testing apparatus, the
testing setup, testing jig.
So two ton engine crane hooked up to a little crane
scale and then this is an early 1900s dental lathe, basically a grinder for
dentists. It weighs 48 pounds. So in theory and in previous tests I can put
this here put the nail and the board underneath, slowly lower this, and see how
much change there is in the weight which will give us a rough estimate of how
many pounds takes to pierce through. Alright, first test. We got this little
circle of the outsole. Pop that into our rig here. Get it in there like that. Screw our top
on, and make sure this one's really tight because this one out of all them has the most
opportunity to stretch.
Pop our guides in. Line it up. Now attempt
to guide this baby in. I'll try to guide it a little more from the top this time. Let's go to the playback to see what
happened. So after reviewing the playback footage it looks like it takes just about
all 48 of the pounds that we have available with the dental lathe. So that
means we're gonna have a beefier set up for the Kevlar I'm guessing. Okay on to
the Kevlar test. Get this popped in there setting tool and I don't think this is
gonna push through. So I got this 12 pound piece of steel that will give us
at least a few more pounds. This is not gonna work. But it's worth a try. Alright here we go.
I'll try not to break any fingers. Well, that's all the 48 pounds plus
the 12 pounds and it's not piercing through.
Let's look at a piece of Kevlar
though. So, the Kevlar after the test: pretty big dent in it. It definitely
didn't go through. So I think next what I'm gonna do is I'm just gonna try
standing on it and see if I can even get it to go through cuz that'll give us
maybe place to go off of to see how much weight it's actually gonna take and see
if it's even feasible to pierce through this on this video. Alright. We got a
fresh swatch of the Kevlar- the alleged Kevlar. So we get this popped in here. Cap on nice
and tight. Put our guides in. I'm just gonna try standing on it to see if 185
pounds will pierce through this. That definitely went through. That was pretty close to all my
weight. So not the most scientific tests ever done by man but interesting results
nonetheless. So now that we're done with our super scientific testing let's
go through and kind of talk about the results.
So the Kevlar pierced pretty easily under my weight and that leads me to
have a little bit of worry if I was wearing these shoes and I was under the
impression that if I did step on a nail that I'd be safe because I don't think
you would be.
You know it all of your weight on a single nail, I think this
would pierce through and have a chance of getting into your foot, especially
with the size of the midsole, like we talked about earlier, if it missed that
completely you'd be done for because the outsole only took 45 pounds ish to
pierce through and that's barely a quarter of most people's weight, and that's kind of scary. As for the overall shoe I think if you're planning
on using this shoe just as like a shop shoe where you want a little bit of
extra protection just in case something goes horribly wrong it's not a bad
choice for $45 but there's way better shoes out there and I think you have to
go into it knowing that there's a chance that it could go catastrophically wrong.
You know, we didn't- I ran out of time to test the steel toe.
I really wanted to
test it but it's Tuesday night this video comes out Wednesday morning,
tomorrow morning, so I'll probably save this steel-toe test for maybe a another
video where we go a little bit more in-depth on steel toes and maybe get a
group of steel toes and test them on some better testing equipment because
this was far from scientific so if if this wasn't educational, hopefully, at
least, it was entertaining because it was fun to do even though I'm drenched in sweat
now. And it makes me really want to get some real testing equipment.
And after doing
this, it kind of makes me think that's where the future this video or this
channel is gonna go where I can hopefully get some real-world testing
equipment and take as much bias and take as much opinion out of these things kind
of like project farm does if you guys have ever seen that channel. I would love
to do that style of video with some real-world
testing equipment and really settle some arguments and opinions and make them as
scientific as possible. So if you enjoyed this consider liking subscribing and
commenting so that we can afford to get some real testing equipment. So thanks
for everything you guys do. See ya..